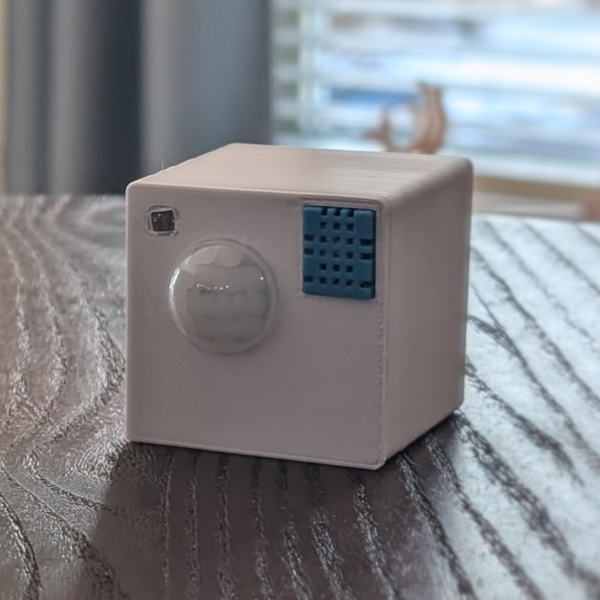
Only Sensor 4

The Only Sensor 4 is based on the OS5, but removes the mmWave sensor to reduce cost.
Features
The Only Sensor 4 offers:
- PIR motion detection
- Temperature
- Humidity
- LUX
Parts
The ESP8266 has been selected for it's lower power utilization and price. You may wish to upgrade to an ESP32 for the ability to handle inputs from many sensors at once in case you wish to upgrade this sensor to an OS5. In addition, an original Panasonic PIR sensor is used to ensure fast and accurate reaction time. While other PIR sensors will work, the Panasonic model has proven to be much faster in normal day-to-day operation.
- Controller - ESP8266: https://www.aliexpress.us/item/3256804158044498.html
- Choose the
D1 Mini Type-C
- Choose the
- LUX - KY-018 3-pin: https://www.aliexpress.us/item/2251832633874422.html
- PIR - EKMC1603111: https://www.aliexpress.us/item/3256805511642735.html
- Temperature + Humidity - DHT11: https://www.aliexpress.us/item/2251832654578110.html
- Choose 4 pin,
DHT11
- Choose 4 pin,
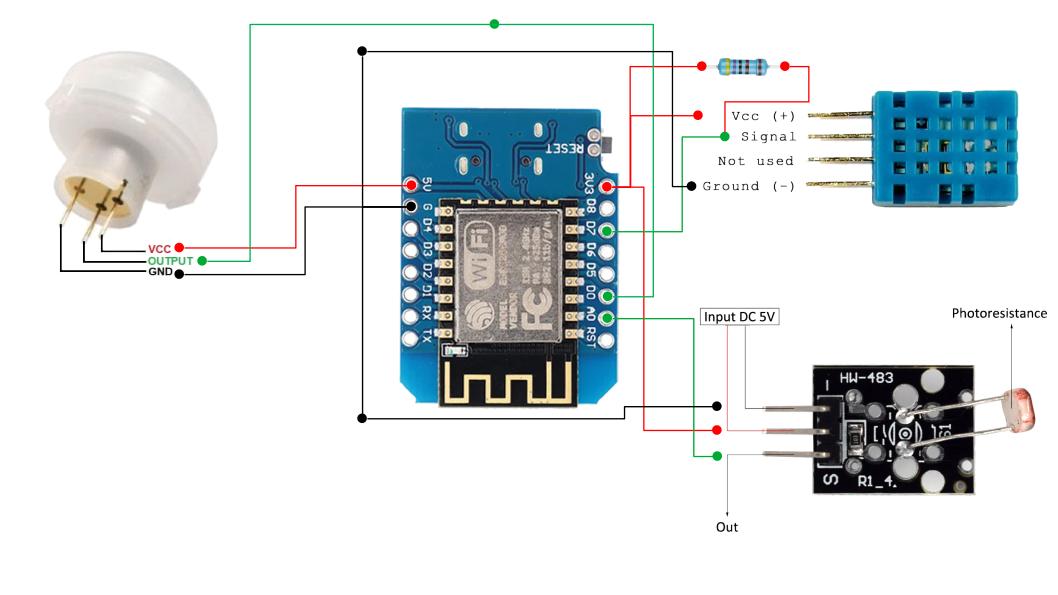
Wiring diagram

Enclosure
The OS4 uses the OS5 case, which comes in two flavors, small and large. We recommend building the OS4 in the small enclosure, as it does not require any extra room for the wiring required on the OS5.
Enclosures cases should be printed without supports and the back on the build plate. Enclosure covers should be printed with no supports and the face on the build plate.
Don't forget to flash the software before assembling!
To assemble:
- Pre-wire all elements
- Pop out the charge port support that is built into the model
- Screw the ESP into the housing in the back with self-tapping screws
- Press fit the LUX sensor into the side of the case using the screw holes in the sensor
- Place the temperature/humidity sensor face-down in the cover
- Press-fit the PIR sensor through the cover from the back
- Place the cover onto the case, being careful to align the LUX sensor as you go
Download at Printables: https://www.printables.com/model/1106401-only-sensor-5