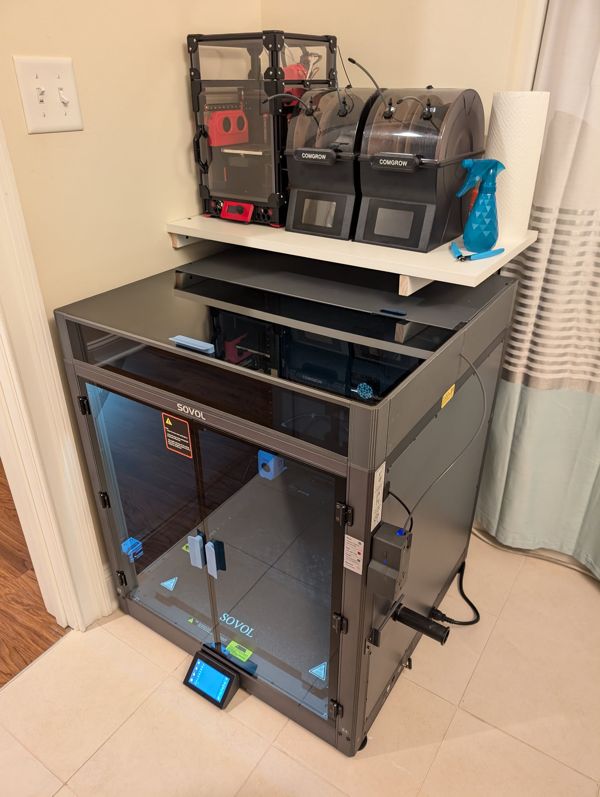
Sovol SV08 Max top hat
- Windowed front panel to match the stock enclosure
Bill of materials
- 2 (maybe 3) spools of Polymaker Dark Gray ABS
- M4 and M3 bolts/nuts (
M2M3M4)- 22 M4x12 bolts
- 22 M4x12 nuts
- 15 M3x8 bolts (+8 more if you use foam on your top-back cover)
- Heat set inserts (
M2-M4 600pcs)- 4 M3x4x5 heat set inserts
- 4 M3x3x4.2 heat set inserts
- Plexiglass
- Chemcast Cast Transparent Colored Acrylic Plexiglass - Transparent Dark Smoke - 36%
- 3 mm Thick, 623 mm Wide, 83 mm Long
- I ordered 3, because it was the same price as 1.
Printing
Notes for printing:
- Polymaker Dark Gray ABS is the recommended material for it's matching color and heat capabilities
- Scale long prints to 100.4% to handle shrinking
- Note: The corners are not scaled, as they did not require it in my test printing
- A 3MF setup for Polymaker Dark Gray ABS for printing all parts on the SV08 Max
- Includes proper supports, attached brim, and other elements to make printing smoother
- WARNING: The 3MF file also includes a -0.2 bed height to ensure "stick" from the ABS, as these large parts have a tendency to curl off the bed. MAKE SURE THIS IS OK FOR YOUR PRINTER
- 3MF setup for Polymaker Dark Gray ABS for printing corners on a Voron V0.2 if desired to speed things up
Installation
Heat set inserts
Install the 4 M3x4x5 heat set inserts into the back corners, and install the 4 M3x3x4.2 heat set inserts into the back and rear-sides.
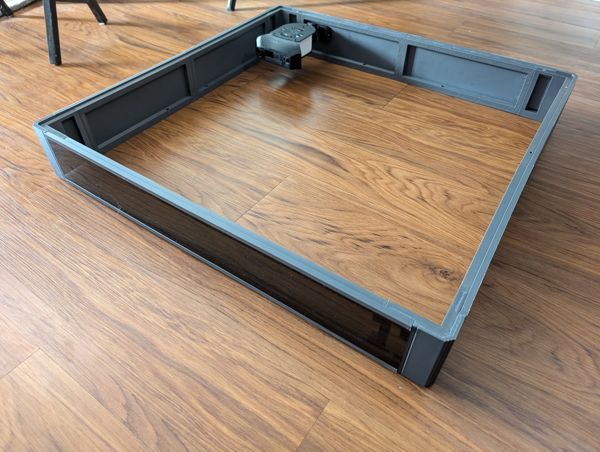
Assembly
Assemble the sections as seen below. Each sections has bolt/nut mounts at each connection point to allow for minor adjustments between sections to get the best alignment for your tolerances. Each piece is attached using 2 M4x12 bolts and nuts (total of 22 bolts and 22 nuts).
Attach a Nevermore Mini to the back of the top hat, or cover the holes.
Attachment
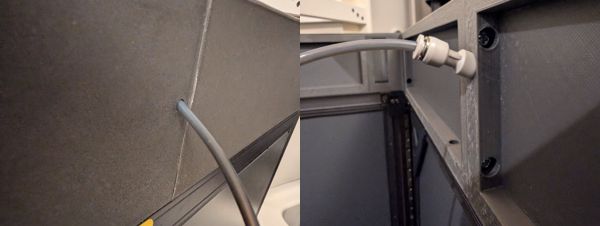
Attach the top hat to the printer using 15 M3x8 bolts. You may need to adjust the connections between each section to ensure proper alignment for the holes. Slide the PTFE tube through the 45 degree hole in the side, and rest the connector in the slot on the inside.
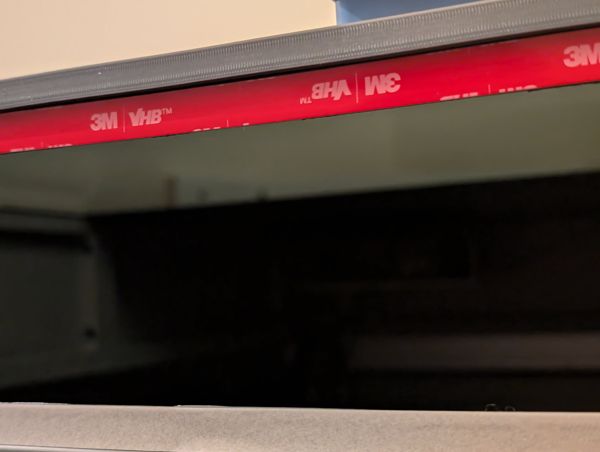
Install front plexiglass
Install the plexiglass by putting 3M VHB tape across the seam, and push the plexiglass in. This is best done post-attachment as it allows you to push up on the center of the top beam to ensure perfect alignment.
Attach the top
Lastly, attach the top cover of the printer. If you have added 2mm foam to the top back cover as is recommended to reduce noise and vibration when installing the factory enclosure, you may wish to increase the length of the screws to M3x8 from the factory M3x6.
Optionally add a SV08 Max Top Plug to fill the hole left where the PTFE tube originally went in.
Download at Printables: https://www.printables.com/model/1466455-sovol-sv08-max-top-hat